
Arduino Powered Compressed Air Rocket Launcher
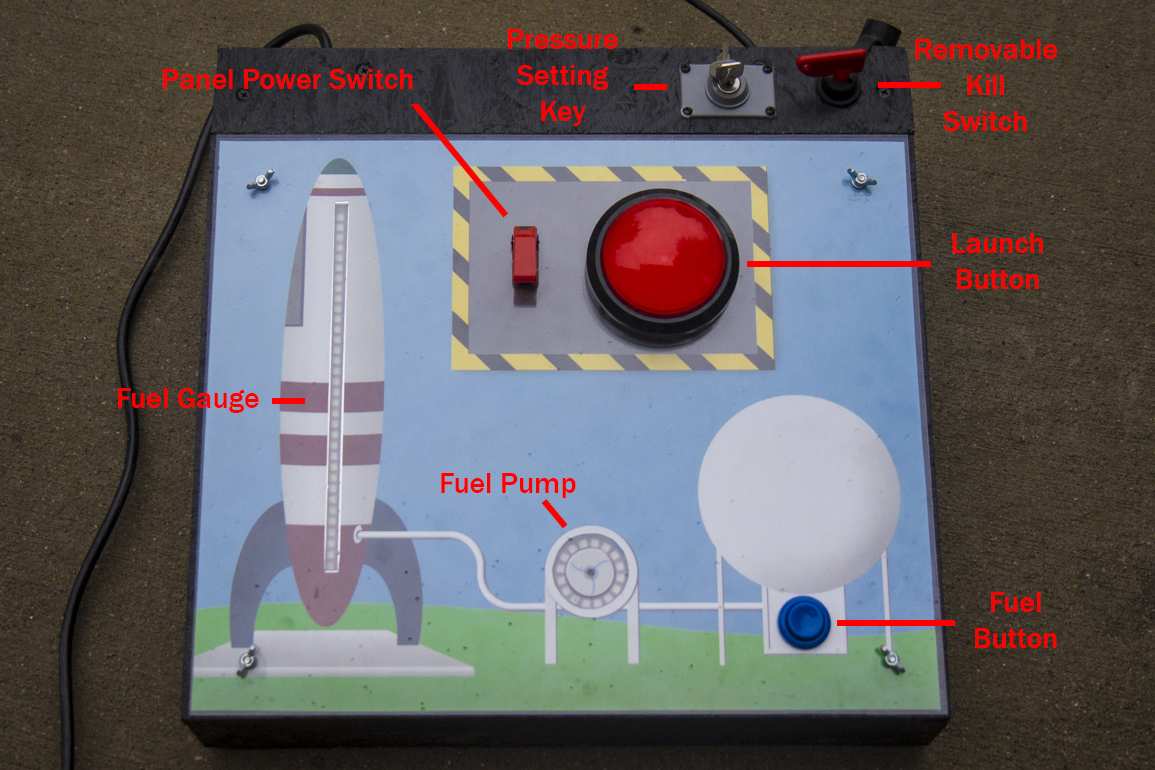
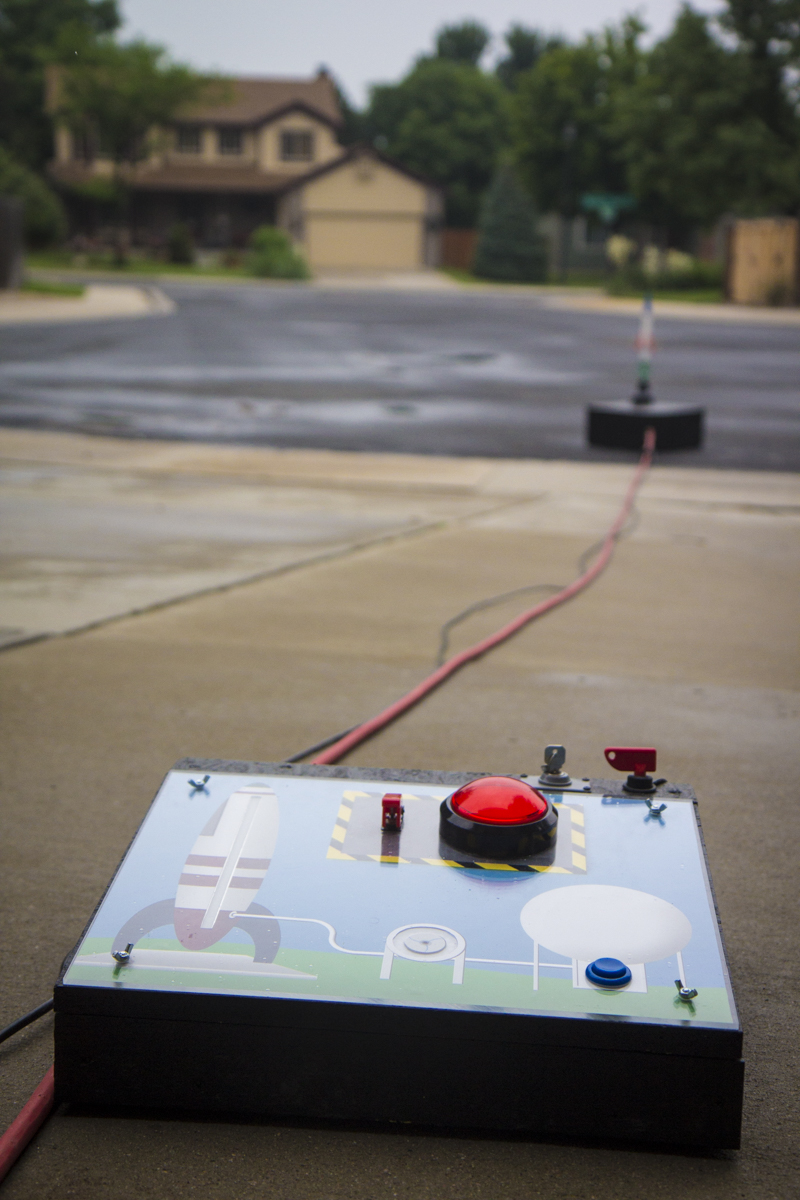
An Air Rocket Launch Control Panel and Launch Pad

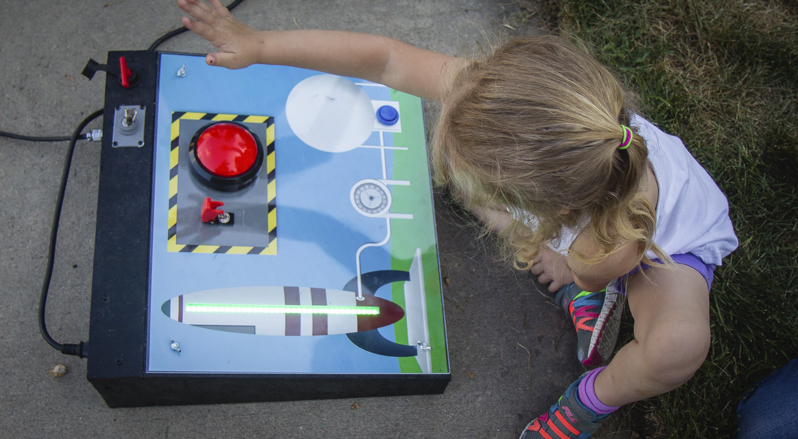
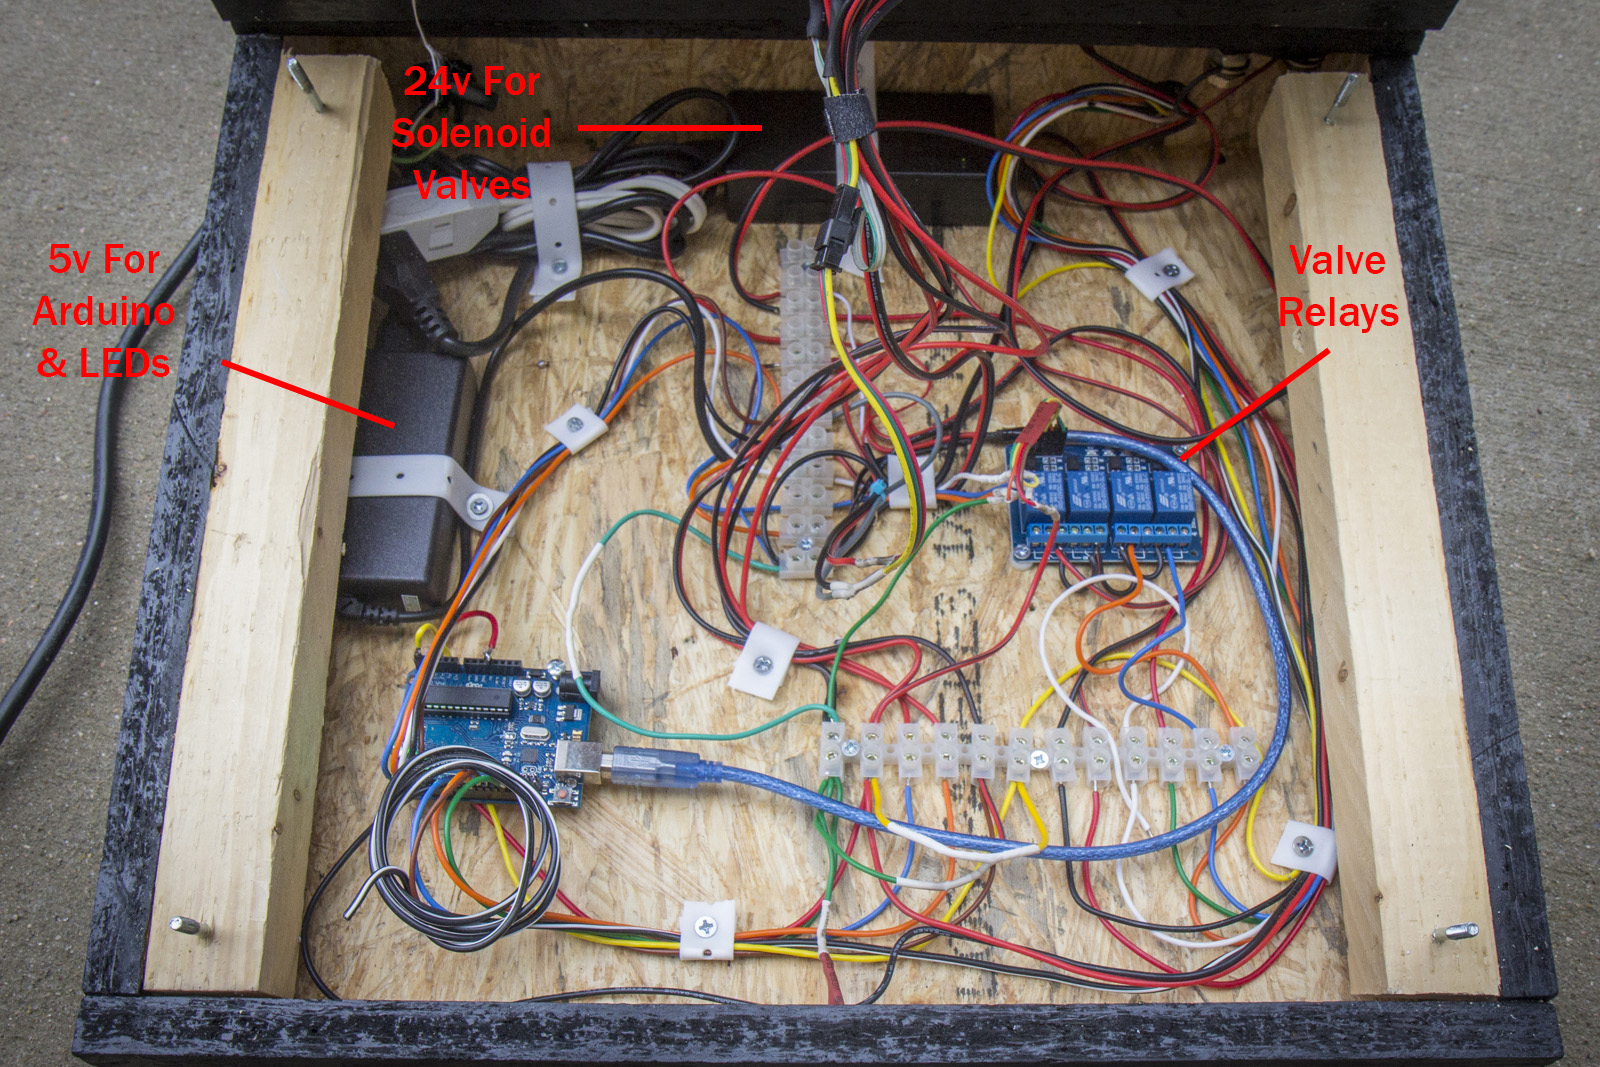
One of the first things we found was that it takes longer than a 4 year old’s attention span to wait for the air tank to pressurize, and it was hard for them to hold down the fill button long enough to get a good charge before they would succumb to the draw of that big, red, shiny, candy-like launch button. I decided I wanted to add some fun, colorful, animated LEDs to help make it more interesting to wait, and to provide a fill gauge that the kids could watch to see progress. Animated LEDs meant it was time to bust out yet another Arduino!
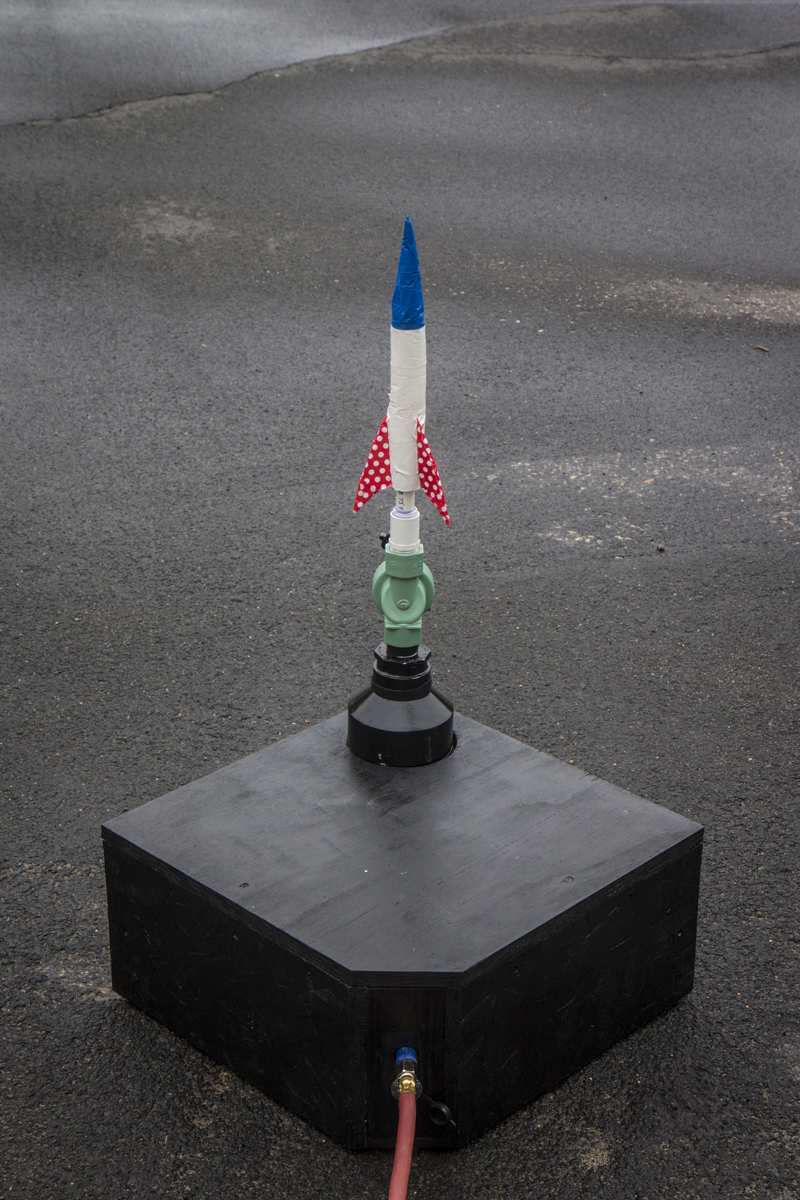
Another problem we saw was that the older kids (up through age 75 or so), wanted the highest pressure setting they could talk me in to, even if it meant occasionally destroying their rockets on the pad. The youngest kids on the other hand, built less aerodynamic and structurally sound rockets. They didn’t care if they held the height record, but it did make them sad when their rockets burst. I did a lot of running out to mess with the regulator on the launcher tank. I decided that if I was going to use an Arduino to read the pressure in the tank to drive the fill gauge, I might as well add a pressure adjustment option to the control panel. I found a momentary key switch that seemed perfect since an adult could pull the key out and keep it if they felt like the kids couldn’t be trusted with it.
I used an oil pressure sender off ebay to read the pressure in the tank. I set up a routine in the Arduino code for adjusting the pressure where holding the key switch would move a white dot up and down the fuel tank strip and you could release the key when you hit the pressure you wanted. The lowest pressure is about 25 PSI, and the highest is right at 100 PSI.
Here is the new panel set to the lowest pressure:
And here it what it looks like to adjust the pressure and launch at 100 PSI:
A few other details I added:
~ A removable kill switch key that prevents the valves from working if removed. Parents can take this with them out to the launch pad if they cant trust kids not to launch rockets while they are out there, or remove it quickly if a kid runs out near it while it is full.
~ A panel power switch just for added drama in the launch routine.
~ A red light in the launch button that blinks when the tank is full and the rocket is ready to launch.
~ A little ring of chasing LEDs as a sort of animated fuel pump thing.
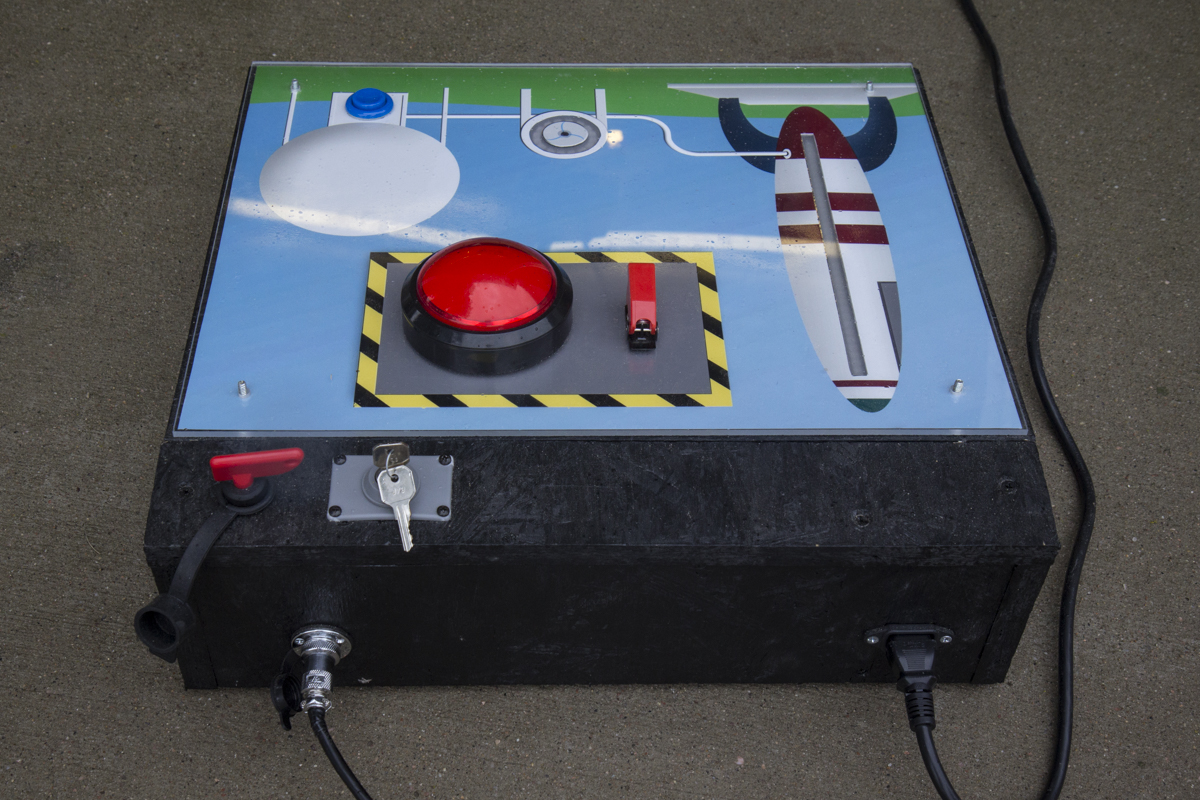
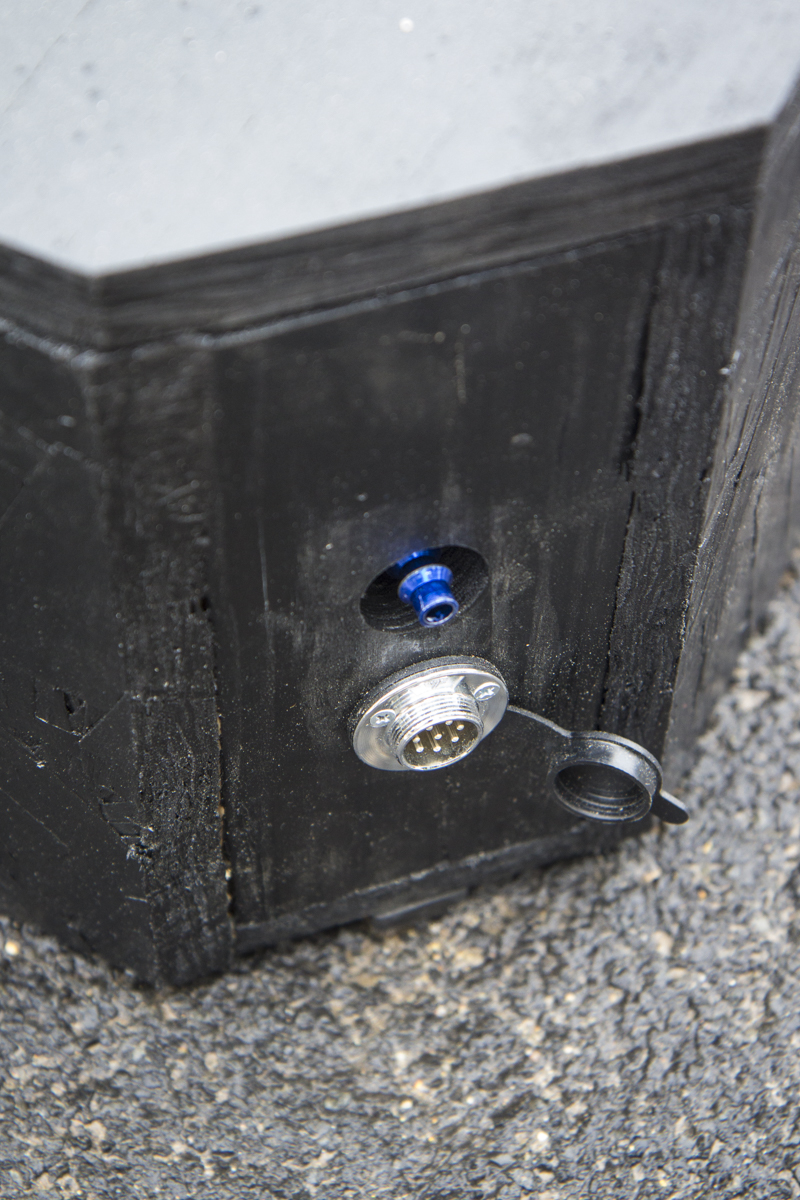
~ A pair of 8 pin bulkhead style aviation connectors and 50′ of antenna rotor cable for a nice clean reliable and removable link cable between the panel and the launcher.
This build got a little too involved to write up a step by step unless someone is interested. Just leave a comment! And in the mean time, my Arduino code and the background image are available here, download zip link in the bottom right. I did the best I could with the background image. I would LOVE to get something better looking if anyone is inclined to make one. The PSD with the blanks for the switches and lights is in that zip file.

Leave a Reply to Rob Cancel reply