
Arduino Infinitely Variable Interval Timer
A customizable touch programmable timer for less than $40!
| Part | Cost |
|---|---|
| Arduino of some kind | $15 |
| Arduino Nokia 5110 LCD Module | $7 |
| Wall wart or transformer | $8 |
| Solid State Relay | $5 |
| Ebay Pushbutton Switches | $2 |
| Tupperware box | $2 |
| TOTAL | ~ $40 |
My parents have a small acreage outside of town where they have established a small clean food market farm.
The plot was used as a cider orchard at the turn of the last century, and the back acre still has a small orchard of 100 year old cider apple trees. (From which we have made all sorts of tasty things)
My dad has always wanted to expand the orchard, and when he met a local hobby arborist who has collected and cultivated his own small orchard of exotic and heirloom fruit trees. The guy was willing to provide my dad with cuttings and some help getting them started, so the time had come!
It turns out that brand new trees from cuttings require frequent and carefully metered misting with water to keep them from drying up or rotting before they can root.
We couldn’t find an interval timer that was adjustable down to the second with a price tag that didn’t make us choke, so I threw one together with yet another Arduino.
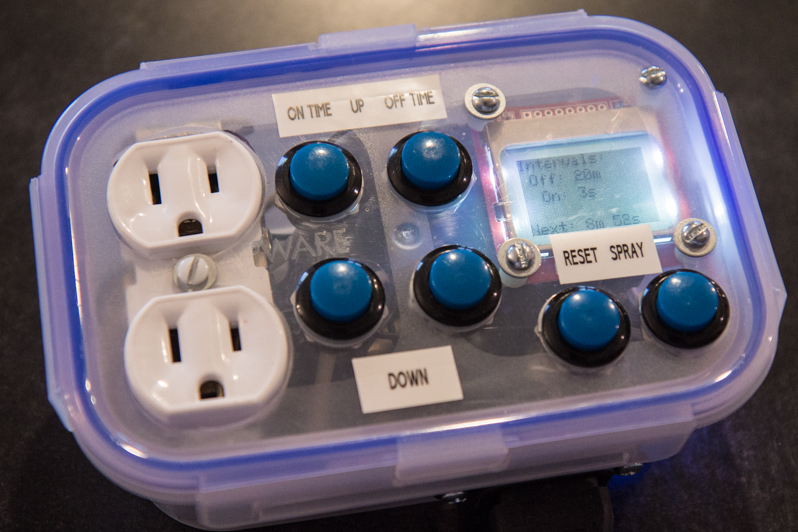
There isn’t much to it, just two countdown timers that alternate, one for off time, one for on time. I used some little pushbuttons to adjust each timer, and added one to reset the cycle and one as a momentary on override (labeled spray)
The only somewhat fancy trick I pulled was to use the on-die non-volatile memory on the ATmega328 to store the timer settings so that they wouldn’t be erased if the unit lost power.
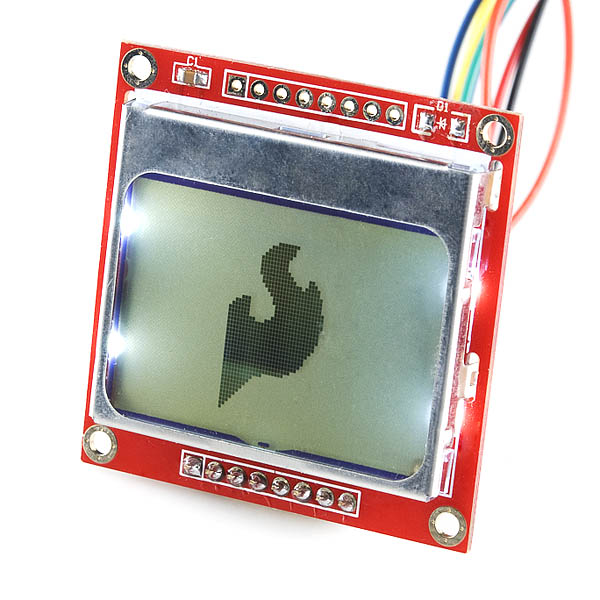
I also decided to include a display since they are so cheap and make everything easier to use. Sparkfun has the module I used, though you can find them a little cheaper on eBay. You need a Nokia 5110 screen module with a PCD8544 controller built in, and you’ll need the library to match it.
I like using these tough little tupperware boxes for projects because they are sturdy, water resistant (or proof, until you poke holes in them), easy to machine, and super cheap.
You can see the pins I used for the buttons in the code, whch you can download from github here (Download ZIP button in the lower right). I used an output to drive a solid state relay which switched power to a sprinkler valve I had around, but it seemed like the output side would vary a lot based on what you are activating or switching.
Leave a Reply