
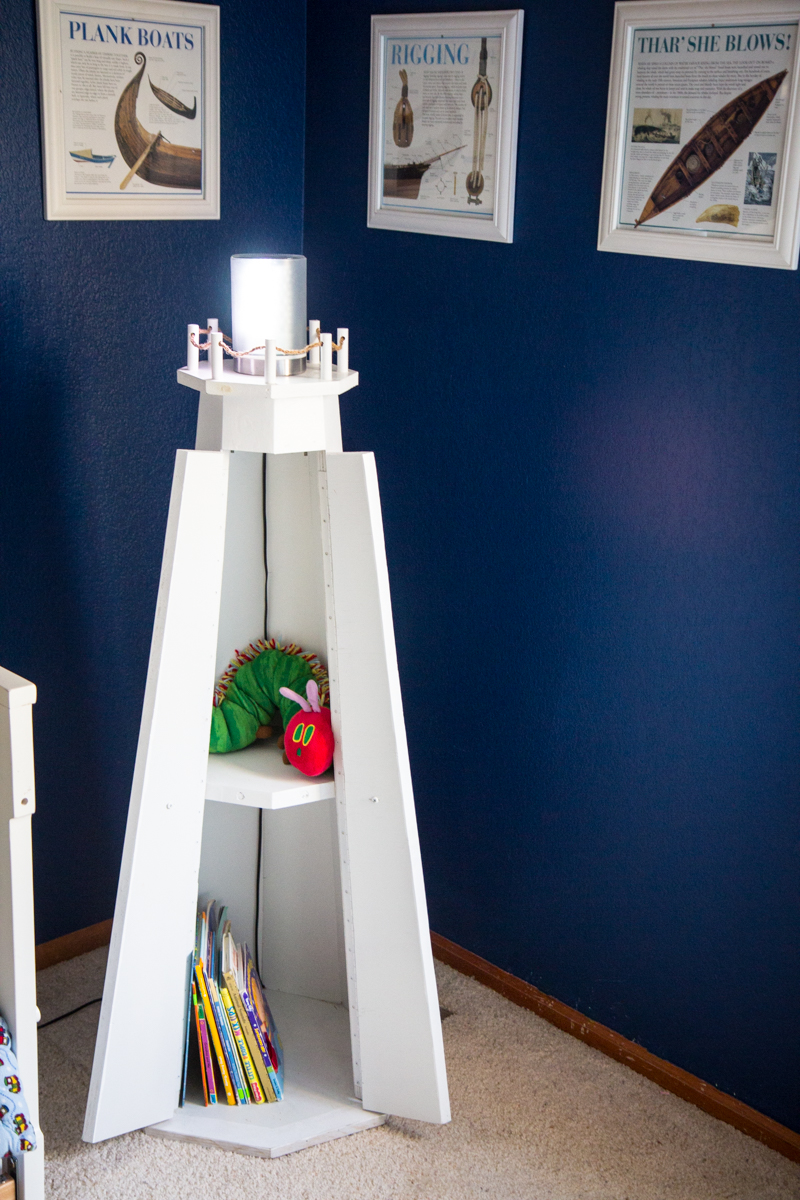
Lighthouse Bookshelf With Remote Controlled LED Beacon
The finishing touch for our little guy’s nautical nursery
| Part | Cost |
|---|---|
| WS2811 Addressable RGB LED Strip | $17 |
| 2x Arduinos | $30 |
| 5v 3A Power Supply | $7 |
| Sheet of plywood or MDF | $30 |
| IR receiver and other bits and pieces | $20 |
| TOTAL | ~ $110 |
 I wanted to do something a little extra cool for our little guy’s nautical themed nursery, and I wanted it to be something special that he would keep enjoying for years. Something inspired me to build a lighthouse bookshelf, and then I couldn’t help but take a stab at making a working beacon for it.
I settled on the idea of a strip of RGB LEDs wrapped in to a cylinder and controlled by an Arduino. As more and more possibilities for cool color options and different modes occurred to me, I decided it would need to be remote controlled as well.
It took some doing, and there were some big speed bumps, but I finally pulled it off.
The biggest technical challenge was using an IR receiver and controlling the LEDs at the same time. I wrote another post about the details, but the bottom line is that it takes in interconnected pair of arduinos to pull it off.
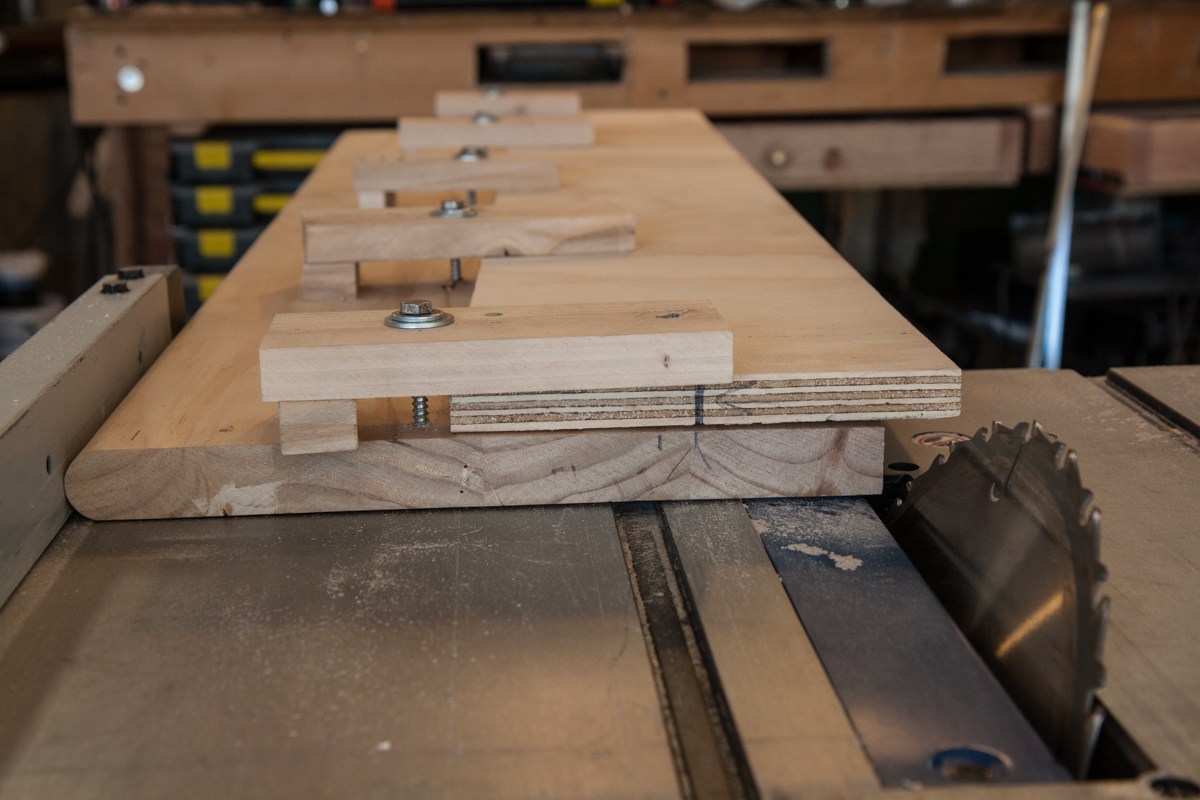
I wanted an 8 sided tower, and I wanted it to be tapered, which means double beveled cuts. After much head scratching, I managed to calculate out the angles required. I built a jig that held the side panels at a bit of an angle with respect to the cut fence of my table saw. Then I set the blade angle on the saw to manage the other bevel. All I had to do was line up center lines drawn on the edge of the side panels with the center mark on my jig, and run the jig through the saw flat and tight against the rip fence, and everything was supposed to work out. I had my doubts, but it actually worked beautifully.

To make a space to hide electronics, I wanted a couple of inches of gap between the octagon that makes the inside top of the cabinet space, and the octagon that makes the platform at the top of the lighthouse, so I cut four octagons, one for the base, one for the shelf, one for the false top inside the cabinet, and one for the top platform of the lighthouse.
For the railing on the platform, I cut little sections of dowel and drilled holes in them, then drilled holes in the platform and glued them in. I chain stitched some hemp twine I had around for the rope.
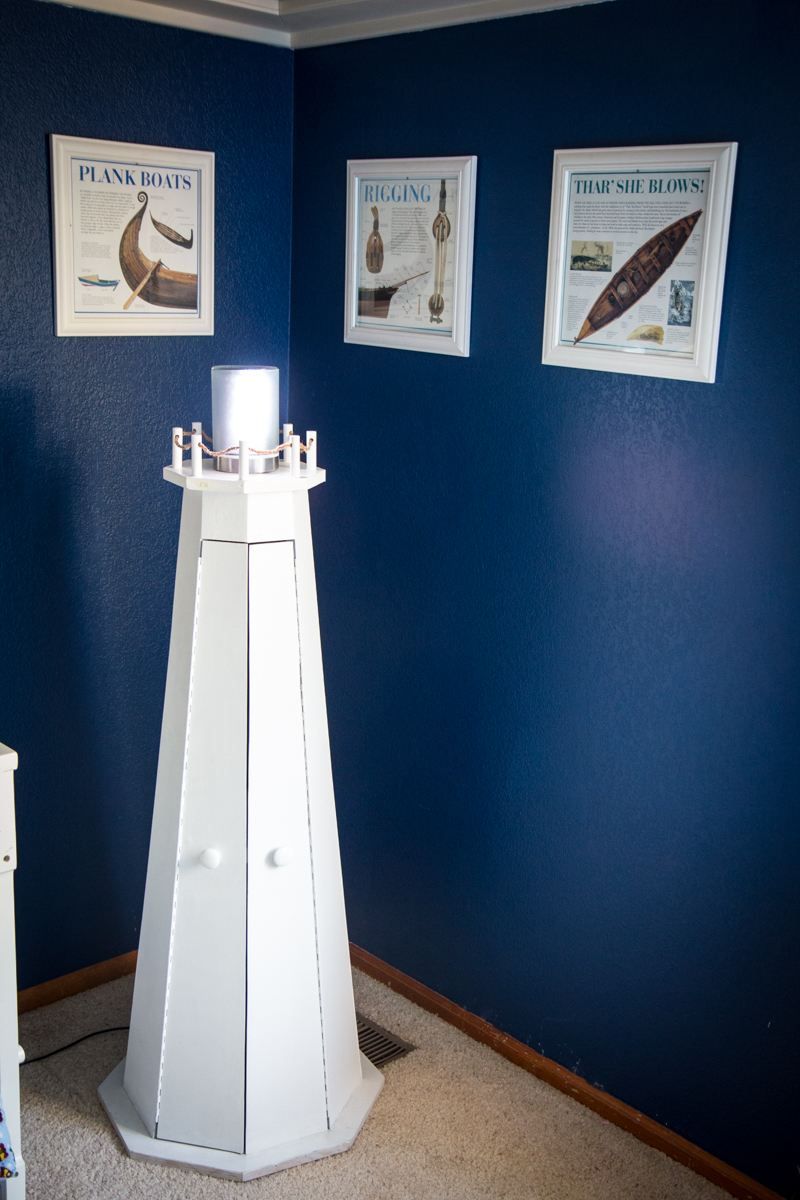
To make the doors, I picked the best two side panels I had, and cut the top couple of inches off of them, right where the top of the cabinet space fit. Those top parts were glued and screwed in place, and the bottom parts became the doors. I wanted them to be extremely durable, so I attached them with some good piano hinge. After plenty of eyeballing, gluing, countersinking, screwing, filling, sanding, priming, and painting, things were looking really good.
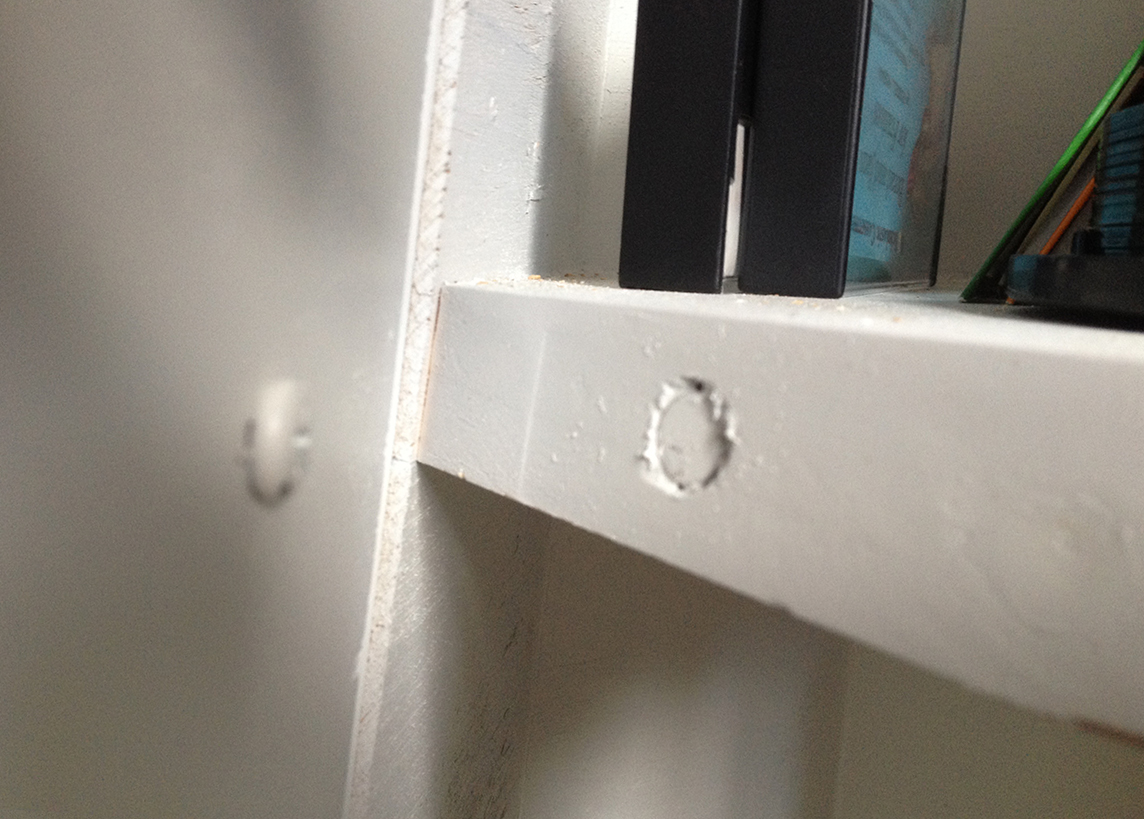 I noticed the doors tended not to sit all the way closed, so I drilled pits in the middle shelf right where the door handle screw heads touched it, and sunk some cylindrical super magnets in there with some glue smeared on them. I flattened the heads of the screws a bit to get some surface contact between them and the magnets. The effect is perfect, you get a nice hearty feeling clunk when you close the doors, and they hold themselves shut tight and square.
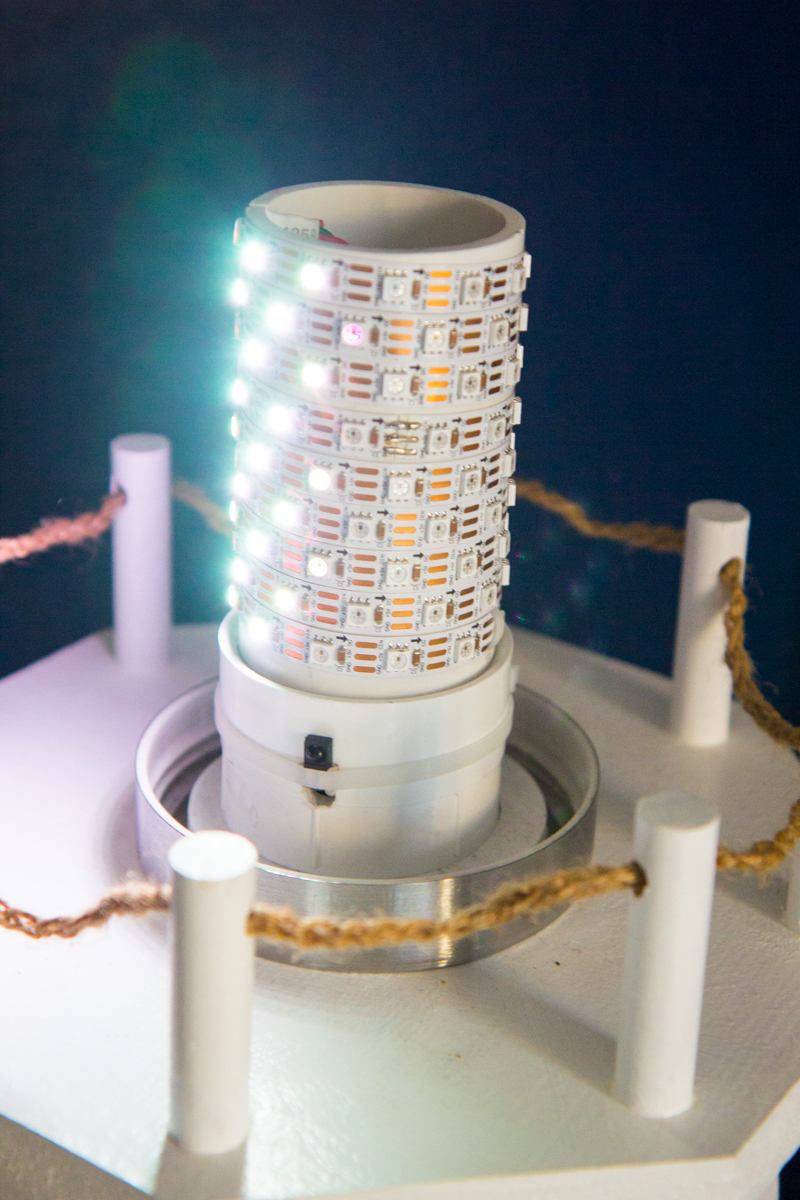
For the beacon itself, I used about 4 inches of 2″ pvc pipe. I used a strip of 100 ws2811 rgb LEDs. I got the 60 LED per meter variety to try to pack them in tight. I cut a notch in the top for the wire to pass out through, wrapped the tape and attached it at the bottom. The control wires go down through the pipe in to the electronics cubby. You can also see I drilled a little hole for the IR receiver near the base. The glass is a candy jar with a threaded lid that I found at hobby lobby. Its wrapped in frosty window cling vinyl to defuse the light a bit.
The whole top platform and beacon assembly threads together. The pipe with the LEDs on it slips in to a 2″ pvc slip/thread fitting, which threads on to a 2″ threaded close pipe nipple. The pipe nipple comes up through the wood platform, then up through the candy jar lid, which I drilled a hole in, then up in to the beacon pipe fitting. At the bottom of all of that I thread another 2″ pvc thread/slip fitting up to tighten it all together. The jar screws on to its lid over the top of it all. I glued spacer blocks on the the bottom of the platform with allthread in them, the allthread runs down through the top of the cabinet where wingnuts it all down on top of the tower.
 All that’s left is wiring and software! As detailed in the other post, it took two Arduinos to pull off the IR remote control and drive the LEDs at the same time. For this project, I wanted our little guy to have some control options, so I grabbed a little remote off ebay and used Ken Sherriff’s libraries to find the codes it used.
I mapped them all to work as expected except the four mode buttons on the right. The top is beacon mode, and if you press it more than once it cycles through ten possible speeds for the beacon. Next one down is a twinkling water effect I threw together. The next is the same water effect, but with random slowly building and fading waves. The last mode is lamp mode, all LEDs on and set to the selected color and brightness.
That’s the basics, and here is my code, download zip link in the bottom right. You’ll need the libraries from Ken Sherriff linked above. Please feel free to ask any questions, I’d love to help! I am so pleased with how it turned out! Our little guy loves it too, he falls asleep holding the remote. I love that he will be able to program new modes for it when he gets bigger!
Leave a Reply to Hans Cancel reply