
Dr. Who’s TARDIS Infrasonic Tapped Horn Subwoofer
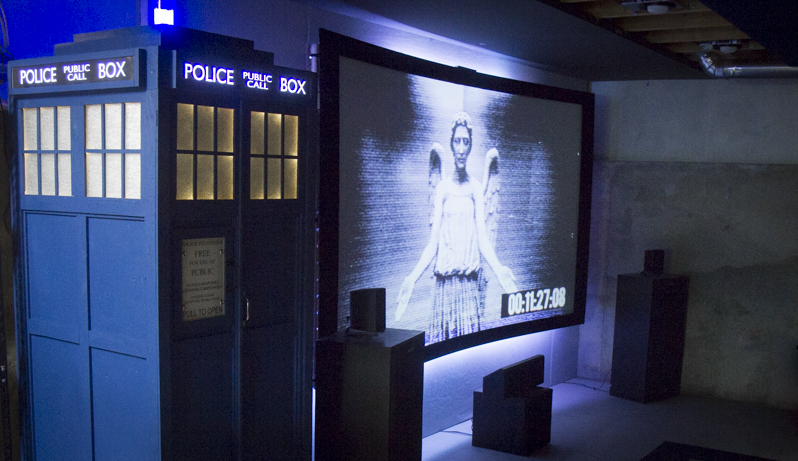
My subwoofer’s chameleon circuit got stuck back in 1963.
A few years ago, I built an enormous infrasonic tapped horn subwoofer for my little home theater, based on lilmike’s lilwrecker plans over at AVSForum. It was a huge success … and a huge eyesore.
Last fall I thought of the perfect disguise for it and couldn’t wait to get to work!
The majority of the work was just glueing, clamping, and waiting on all the batten work. But I thought I’d share notes and stuff for the more interesting parts!
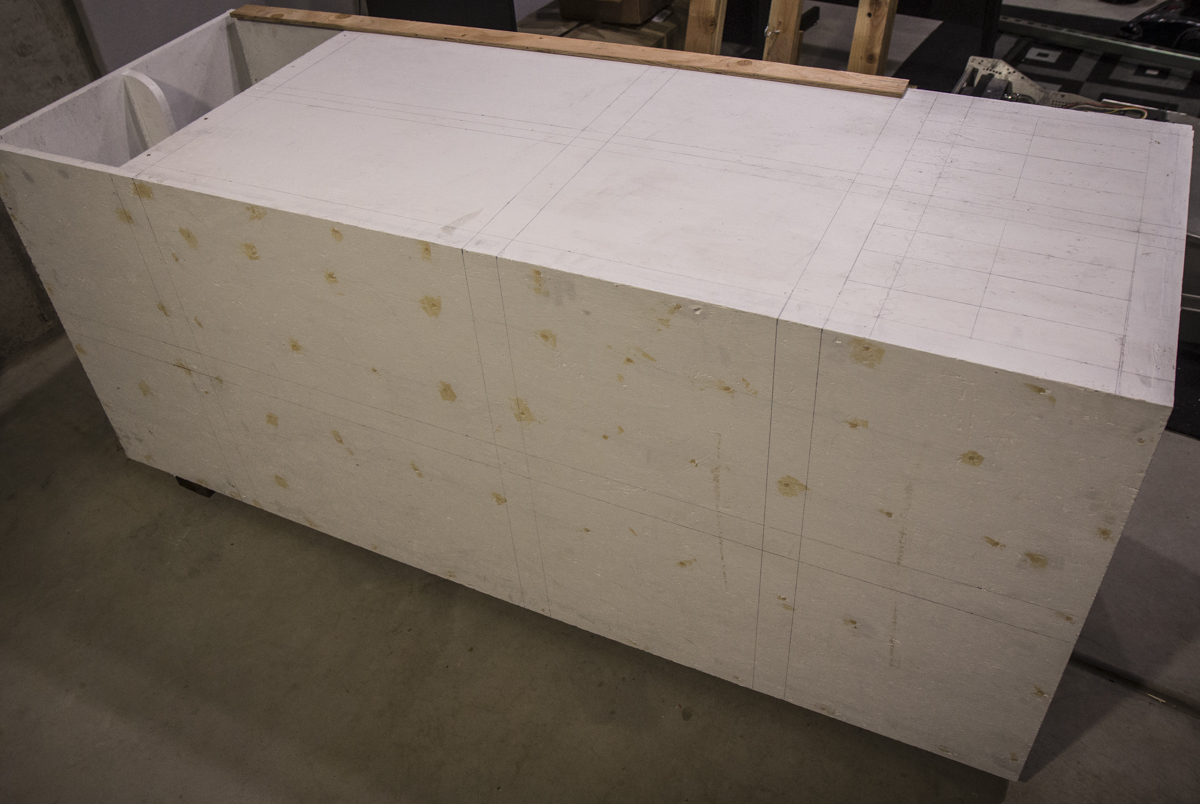 Batten Work
I really wanted a sort of distressed, slightly shoddy, built-and-maintained-on-municipal-contract-by-the-lowest-bidder look, without the whole project just looking poorly executed. To that end, rather than use finish wood, I bought two sheets of super cheap 3/8″ plywood and ripped them in to dozens of strips. I deliberately exposed the less finished side of the strips for a nice lumpy woodgrain texture. I really love how it turned out!
 I didn’t use any screws on the batten work because I didn’t want to compromise the speaker box. Instead I used two tubes of Loctite PL and did a lot of clamping. I went a little crazy with it because I really didn’t want anything buzzing or rattling when the speaker was thundering, since it really doesn’t kid around about thundering.
I wasn’t able to run down the original author of the door sign, but I included it on github. If you have a lead or if its your work, please let me know and I’ll be happy to add a link or pull it or whatever!
Lighted Windows
I’ve had good success on some previous projects using LEDs to sidelight acrylic to get a nice lighted depth effect. I used a router with a rounded head to route out wire chases and LED slots. Hot glue is great for holding everything in the channels.
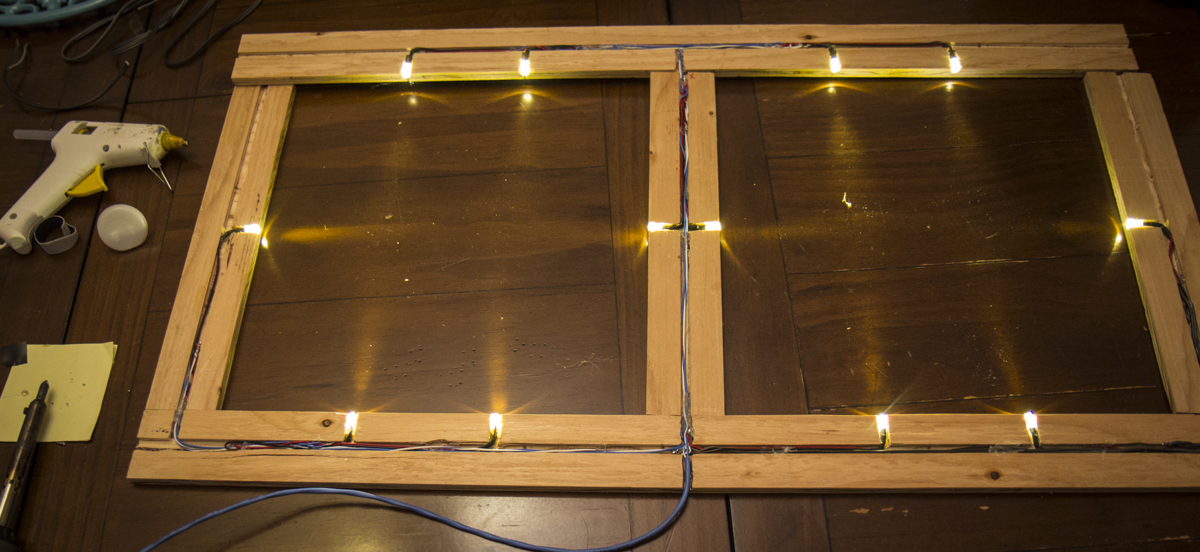 I wanted some contrast between the light from inside the TARDIS and the police box sign on top, so I went with warm white for the windows and cool white for the signs. I placed the LEDs right underneath where the window pane grilles would go to try to maximize the window depth and minimize side lighted look.
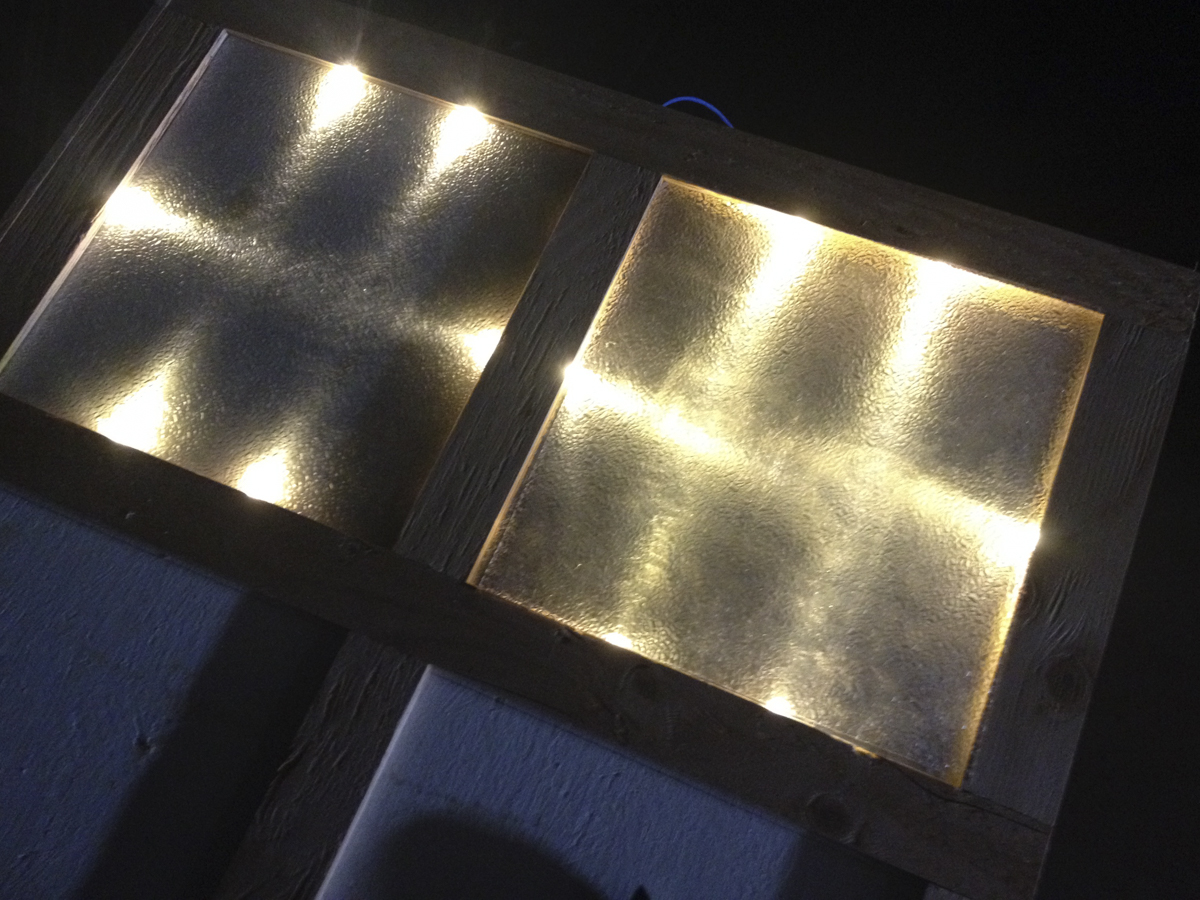
I settled aluminum tape on the wood, two layers of clear 1/8 acrylic, then the defuser panel with the textured side down. I didn’t bother to carefully clean anything because dust and smears and scratches and stuff actually added to the depth of the look.
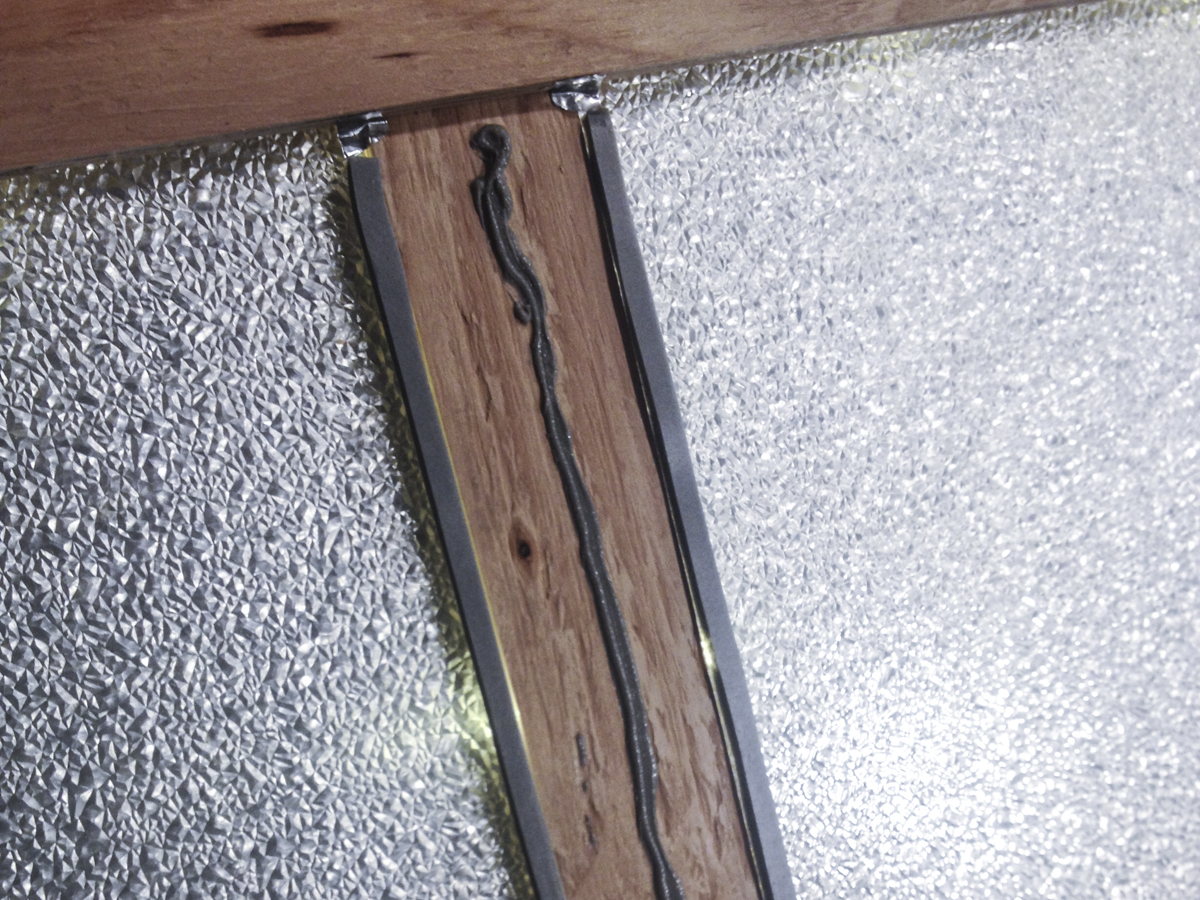
I glued and clamped the window frames to the speaker box once they were ready and I was sure they worked. Then to hold the acrylic panels in place and keep them from rattling, and to prevent light leaking around the edges, I cut some foam weatherstripping in to thin strips and stuck it around the edges of the top sheet of plastic. I used slightly wider batten strips to cover the raw edges of the plastic and squish the weatherstripping to clamp everything in place.
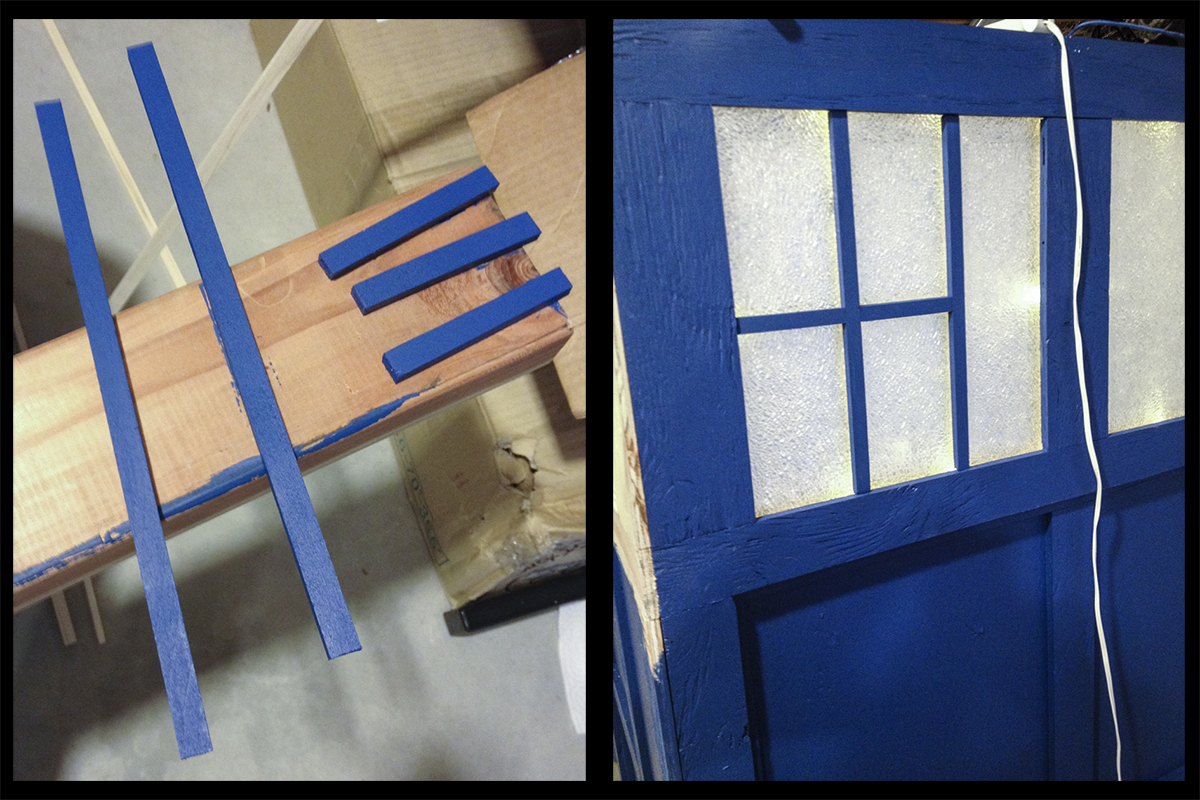
I used soft white pine for the grilles. I pre-painted them and the window frames so I wouldn’t have to worry about masking the windows. I cut them to fit tight and hot glued them right on the face of the window plastic. I am very pleased with the results! The grilles break up the sidelighting perfectly so the windows have a nice depth to them. Standing back and looking at the whole thing, it is very easy to believe they are windows to a lighted interior, rather than a 3/8″ deep surface assembly. Very cool.
 Police Box Signs
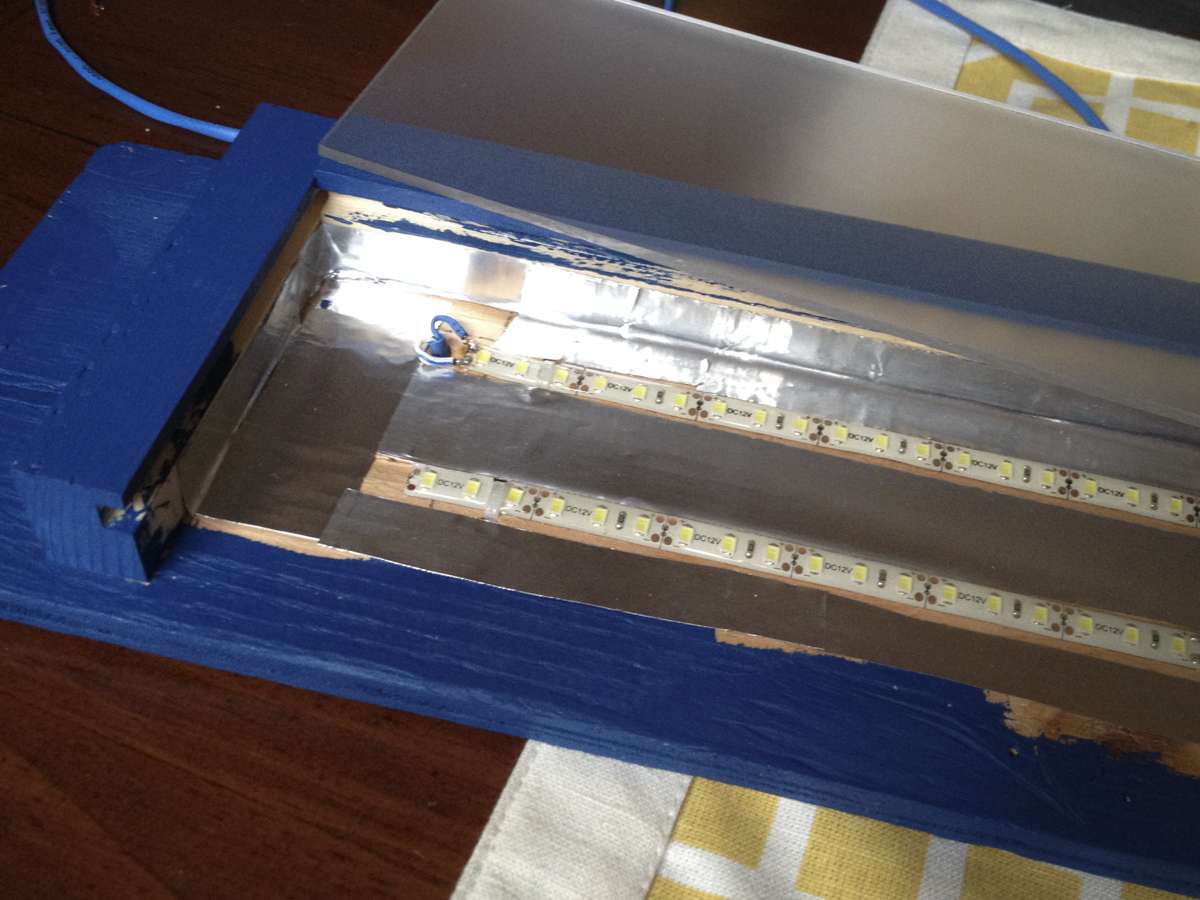
Building the light was the easy part for these. I got 5 meters of cool white LED strip and zip tied it down to a back board. I ran two strips to try to pull off as even of lighting as I could with only 3/8″ or so of depth. I routed out a 1/4″ channel to hold two sheets of 1/8″ acrylic, a front and back panel to sandwich the artwork. The back pane is frosted to spread light, the front was just clear.
I also used more of that aluminum tape to spread light around in there.
The hard part was the lettering. Our local makerspace has a laser cutter that I meant to use for the job. I was either going to spray paint some acrylic flat black and then etch off the letters, or just cut some window cling vinyl. I never managed to get over there at a reasonable hour, so I decided to try to use my laser printer.
I ended up stacking 2 layers of laser printed clear acetate transparency plastic and one layer of printed paper to get enough layers of toner to fully block the light. I expected aligning them might foil my plan, but they ended up being SUPER staticy. They stuck together pretty hard which made keeping them aligned easy. The top paper layer made the letters white instead of clear, and made the whole thing look stellar even with the internal lighting off.
My only beef with it is that I had two use three pieces of 8.5×11 paper across to get the full width sign. If you look closely you can see the overlap when you stand next to it. I didn’t glue the top frame edge to the backboard in case I decide to find time to put that laser cutter to work and do this another way, but I don’t know. It really looks pretty fantastic.
Huge thanks to the guys at TardisBuilders.net for the artwork! I chopped it up for printing on 8.5×11 paper. Printable images and Arduino code for the top light are available here, hit the download zip button on the right side of the page.
The Top Light
I haven’t found the perfect lamp exterior for this yet, so I just threw something together with a mason jar and some extra grille material. For the light bulb itself, I went a little wide of authenticity on this one because I really can’t help playing with Arduinos and addressable LEDs whenever I get the chance. I didn’t want to go overboard, but I wanted a little bit more than a blinking blue light.
I started with a smaller version of the LED core I made for my lighthouse bookshelf. I threw together a low blue ripple effect for when its just sitting around, and a sweeping pulsing landing effect. I put a little button on the back of the TARDIS to switch modes. Code and artwork are available on github, hit the download zip button on the right side of the page.
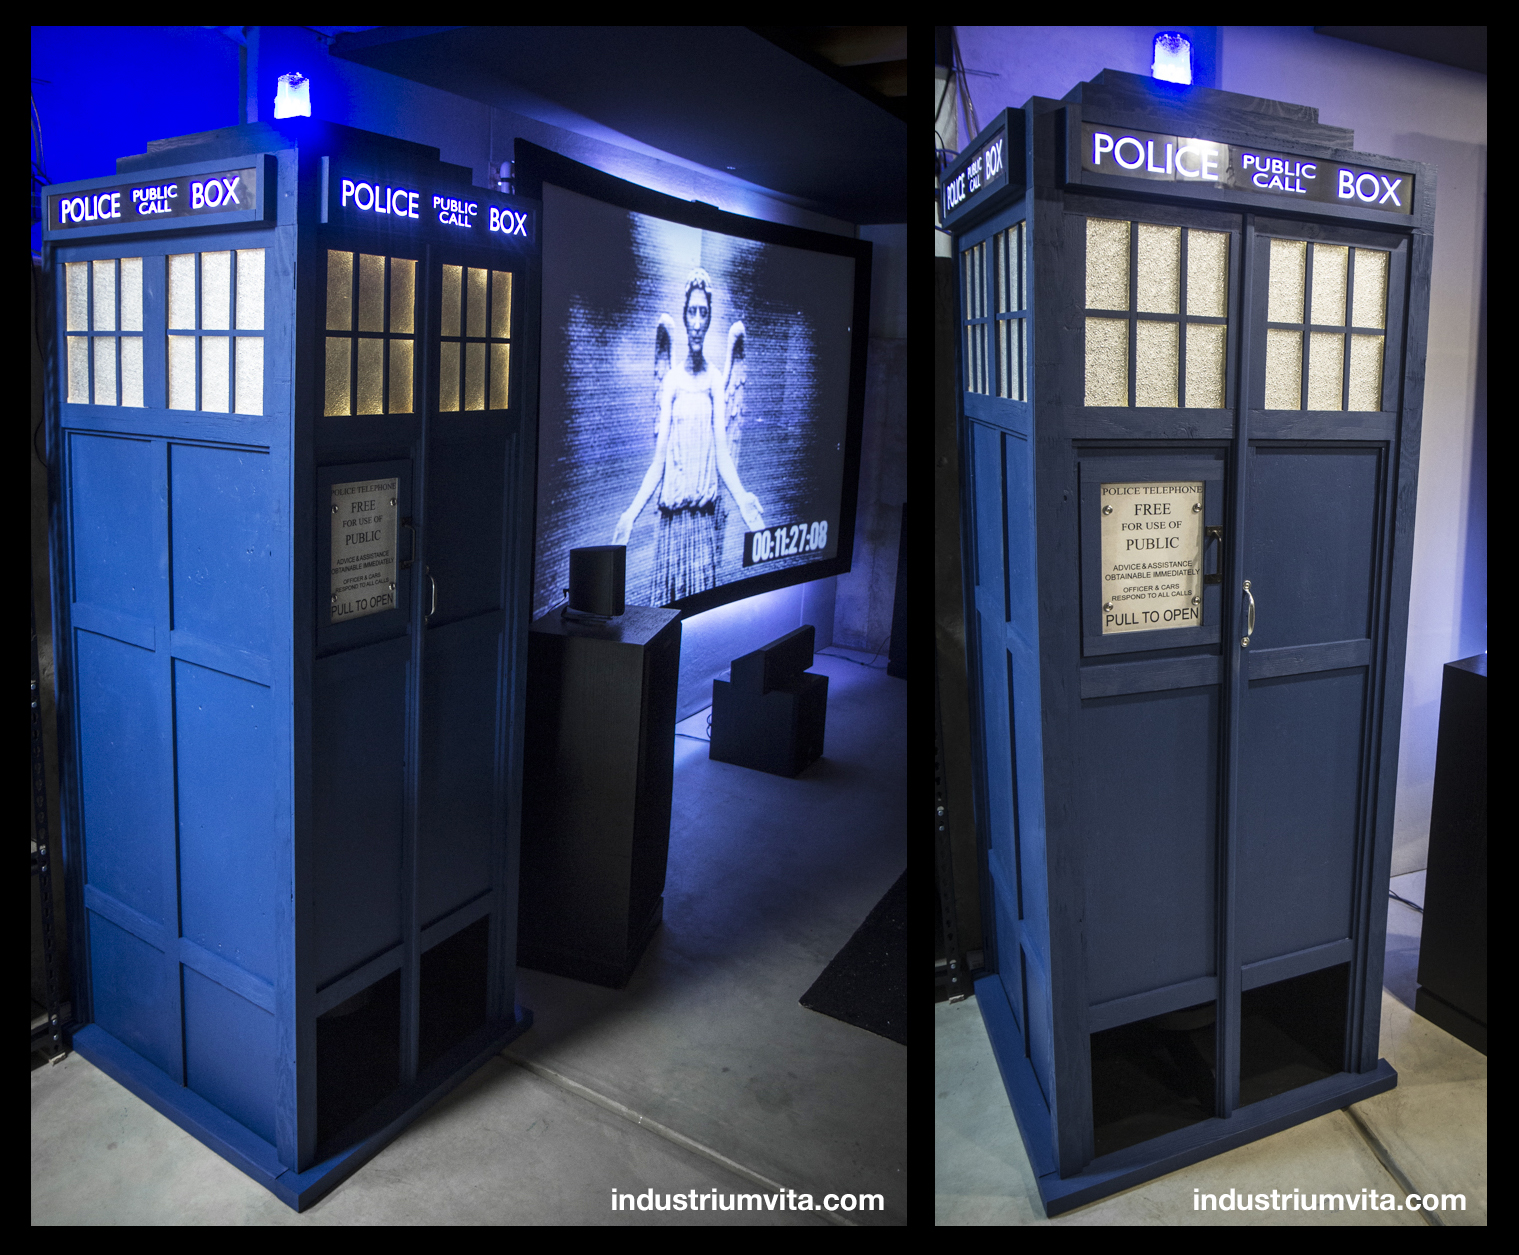 And thats it! I’m extremely pleased with how it turned out! Its a pretty awesome conversation piece in its own right, but more than that, it is a huge improvement over the big bare wood box it has been for the last two years.
Leave a Reply